(So, the title doesn’t really work – noun, verb problem. But, sometimes inspiration is an illusive, little, b-!) Next up in the coverlet project, let’s sley the reed! The yarn has been measured on the warping board and has been twisted off. Next step, insert the lease sticks!
Lease sticks are 2 sticks with holes in the ends. Their purpose is to slide through the cross and keep all the yarns in order. In this case, I have a whole lot of the same color! So, it’s not quite as critical. But, they are still very important when keeping everyone in line! The goal is to avoid unnecessary twists and knots down the road!
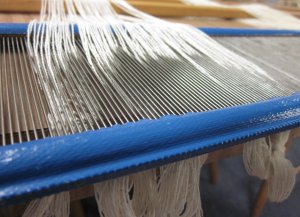
Next up, the yarn goes into the reed! The reed I’m using is a 36″ wide (so it fits in the loom), with 12 dents per inch (12 slots or spaces per inch). Because I have a finer yarn, the yarns share a dent, so I end up with 20 yarns in 1 inch. Project is 18″, thus there is a total of 360 yarns! Math… lots of math!
I like to knot each inch in an effort to double check my counting. It’s saved me more than once!
Because the project doesn’t take up the entire reed, I like to start in the middle to be sure everything is centered! Next up, the reed will go into the loom! There will be more color soon, I promise! Until next time…


