It’s time to sley the reed – my favorite! The warp yarns took a few laps around the warping board and are now ready to find their place in the world (into the reed, in this case!).
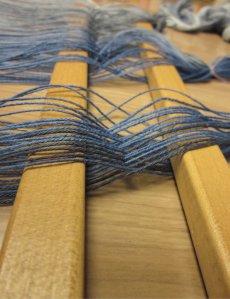
I measured my warp yarns in 3 groups, as you can see in the photo above. They will all be integrated together soon enough! First up, I am threading the lease sticks through the yarn. Why, you ask? Well, the cross I so carefully established on the warping board needs to remain in some format here. So, by tying a knot where the cross is, I can see how the yarn needs to be separated and where the lease sticks slide in. Ultimately, it’s about keeping everything in order!
By the way, the lease sticks are merely 2 sticks with holes in each end so they can be tied together. Not rocket science…On the other hand, someone more brilliant than me thought of it! So, kudos to you, lease-stick-inventor-guy!
Once the lease sticks are in place, I unknot the knots to be sure the yarns can all reach where they are supposed to go.
A weaving reed is a metal, rectangular frame with slots running it’s entire length. It will sit in the loom and help maintain the desired width of the project.
I’m using an 8-dent reed for this project. “8-dent” refers to how many slots are in an inch. So, the yarns are spread out a little more than my usual. The reason is that I’ll be working with bulkier materials and I don’t want the fabric to buckle. Part of the charm of weaving is the million different variables you can control. The spacing of your project is just one of the many decisions you make in determining how it looks in the end!
Just to keep me honest, I try to knot each inch in an effort to double check my math. Ah, math… love it or hate it, it is everywhere in a weaving project!
So from here, I will gingerly transport the reed, lease sticks and lovely twists of yarn to the loom to lock it all in place! The hits just keep on coming! I’ll see you soon!!!


