Heddles are threaded – check! Let’s wind ‘er up!
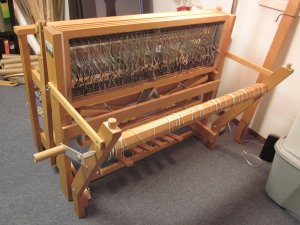
Here’s the view from the back of the loom. It’s completely collapsed because I was sitting really close so I could comfortably reach the heddles.
Next up, I’ll shift the entire back portion of the loom out away from the body and tighten up the supporting pieces.
And then, the back beam slides right on! Ready to wind!
My loom is equipped with a rod that is lashed to the warp beam. (I think in the past, I have confused the names of the various beams. So, for those loom experts, forgive me!) Because of the way this is configured, it allows me to weave as many inches as possible, forgoing lots of waste!
The yarn is tied to the rod. (I’m using the same knots/groupings as I have through the whole measuring process.)
And then, I’m ready to start with the moving parts!
Part of my goal when dressing the loom is to situate the yarns so that they have the clearest, straightest path possible from front to back!
In the winding on process, I have levers and cranks and ratchets – oh my! It’s a twisty dance that goes on. Release this pedal with your left foot while lifting a lever with your left hand, all while hanging on to the back with your right! Twister has nothing on this! I recommend a little yoga tree pose beforehand to help with the balancing!
Little by little, the yarn moves from the front, through the heddles, and around the back beam.
As you can see from the pictures, I have cords to contend with. I don’t really want them to interfere with the yarn. So, yard sticks to the rescue! I tend to go a bit crazy with the yard sticks. But, I would rather have many, many sticks in the project versus not using enough and having tension trouble later. Tension trouble – bad! Very, very bad!
It’s just getting good! I’ll have more winding loveliness next time! And then, bring on the weaving! I can’t wait! Talk to you soon!


