Are you ready to tie one on? No worries – it’s a dry blog post.
A long while ago, I began working with recycled neckties, incorporating them into my fabric. So little by little, word got around that I have the ability to re-purpose your old, unwanted neckties. What this means is that friends/family/strangers bring me bags of neckties – sometimes for a specific project, sometimes just because they want to donate to my art. Fabulous!
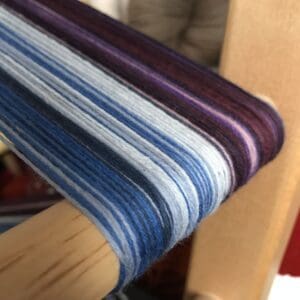
Measuring on the warping board!
Case in point, last fall some family friends (we’ll call them the “J” family) provided me with a bag of neckties. Mr. J is a well-known community member and business owner. So, he’s definitely collected a few ties in his day. They assured me that they didn’t want anything for themselves – they simply wanted to contribute. Typically, I would take these types of ties and add them to the stash. But in this instance, I was feeling the need to take on a random challenge. How do I use all the neckties provided in their bag to create a multi-colored, interesting piece of fabric?
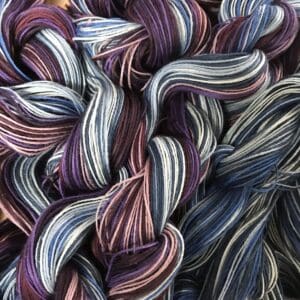
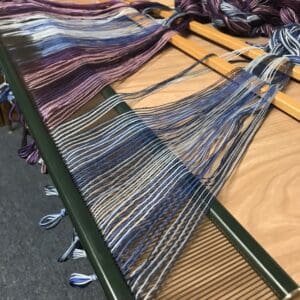
It’s like blue/purple yarn soup!
Step one –
Checking out the goods. Let me tell you, there was a little bit of everything in this bag! Mr. J? Big golfer! Lots of cool golf-related items. Lots of power ties. Lots of color! I kept thinking, “this is going to be fun”! (And p.s. I have scoured my images and somehow, I did not take one photo of the original bag of ties! Swing and a miss!!!)
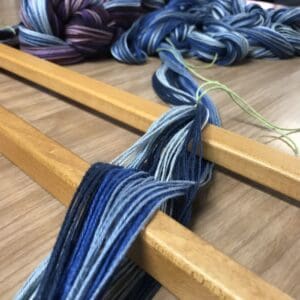
Ready to go into the reed
Step two –
Deciding the size of the project. Because I didn’t have any clue what I would do with the fabric (and ultimately, it didn’t matter), I settled on 4 yards for the length, and about 32″ wide. Whenever the neckties ran out, the plan was to simply play!
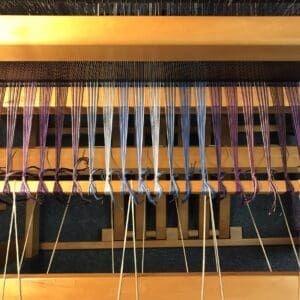
Sleying the reed – my favorite!
Step three –
Picking colors. For this project, I could have chosen almost any color to compliment the rainbow going on! All the colors were all represented. But my gut requested blues and purples. So, there you have it! Always go with the gut.

Winding on to the loom
Steps four-through-seven –
Dressing the loom. This included –
- Warping the yarns (this step measures each yarn to the correct length, in the correct order)
- Sleying the reed (this step decides the spacing of the project)
- Threading heddles (this step places each yarn in a strategic location in the loom)
- Winding on to the loom (just what it sounds like!)
Next up, the weaving will commence! It’s time to fillet some neckties!! Happy Weaving, everyone!
Ready to weave!